xnv-help.png

XnView 1.9x… versions for Windows ®

xnw-sm.png

Picture viewer - Picture browser - Picture processing - Slide-show - Strip of images - Retouchs etc. …© Pierre-E. Gougelet - 1991 ~ 2008 -


Last update: September, 22, 2008 for XnView version 1.95…
©Claude Charries - 2001-2008.
With the kind participation of Paul V… a.k.a. “Ouistiti”


When you don't see any back-link, please use the button :
Previous Page of your Web browser or offline HTML ¦ CHM viewer.
The toolbar buttons shown in the texts are those of my own “Mus_…” series.

 XnView main features 


Go to: Setting OptionsOption-details

• Setting Options •


 The main “View” window 


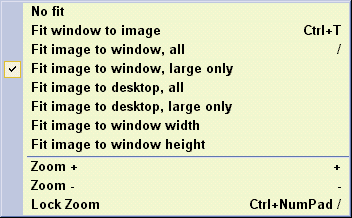
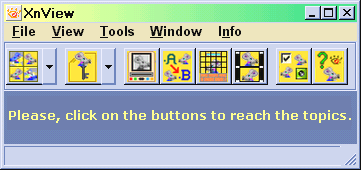
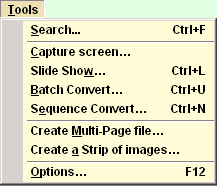
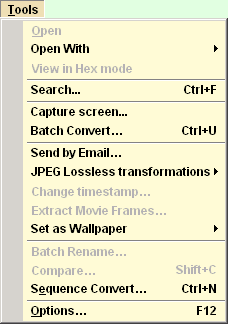
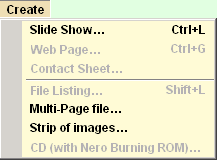
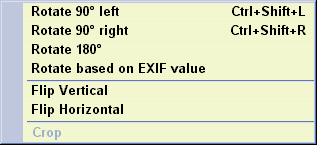
Please, click on the wanted menu to see the full details…
Some menus are modified when using functions only !
Click on the buttons to reach the corresponding topic or paragraph.


 Icons files display 

 Example for a two-frame icon 

Two-frame Icon


 Multiple Icons 
• Libraries: *.ICL - *.DLL - Files: *.EXE - *.OCX - *.CPL •


Back to: Synopsis


• The “File” menu •


Back to: Synopsis Back to: Menus


• The “Edit” menu •


Back to: Synopsis


• The “Image” menu •


Image Menu


Back to: Synopsis Back to: Menus


• The “Filter” menu •


  • From every section, you can get several effects kinds.
  • The picture below shows an example for these effects…
  • There are twenty-nine frames inside this picture.
  • The longest display time shows the original picture.
  • Then, each frame passes following the menu and the “Effect” dialogue commands order.
  • The new shade-effect has been added in that picture (last one). There are two modes for that effect :
  • 1. Resizes the picture itself first, then add the shade (keeps the original size), it's the default setting.
  • 2. Adds margins for the shade (the picture-size shall be increased) Remove the nick from the tick-box in the dialogue.
  • Beside the Effect animation, you can see how that option # 2 looks.
  • Medium values have been chosen.
  • View the “Effects” dialogue
    Effectsombre.png

    Undo

  • When you use a "Filter" or "Image" function , the “Undo” button Undo button becomes usable on the tool-barTool-bar.
  • It allows you to cancel the last modification, if the result isn't satisfactory.
  • Of course, that works only if the file has not been saved after this modification!
  • "Undo" can undo a single change!
  • If you used successively several functions "Filter" or "Image", only the last modification can be cancelled from this button.
  • Starting from the 1.92 version, now we have five “Undo” levels by default.
  • Please, see that paragraph to set a customized number of “Undo” levels.

  • Custom filter


    Back to: Synopsis


    • The “View” menu •


    View Menu


    Back to: Synopsis Back to: Menus


    • The “Window” menu •


    Window Menu


    Back to: Synopsis Back to: Menus


    • The “Info” menu •


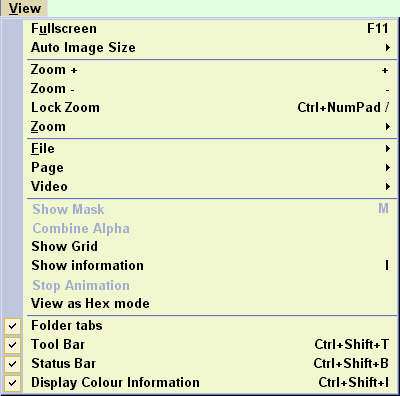
    XnView and "Total Commander®"


    Back to: Synopsis


     Using XnView 

    • Usual operations •

    1. Batch Convert
    2. Resize
    3. Slide Show
    4. Browser
    5. Browser : Subsidiary functions - Menus  Create :  TIFF…  Web Page…  Contact Sheet…
    6. Browser : favourite directories, “Bookmarks”
    7. And more…
    8. Go to : Batch transformations
      Back to: Synopsis

    • Batch Convert •


    Output dir.


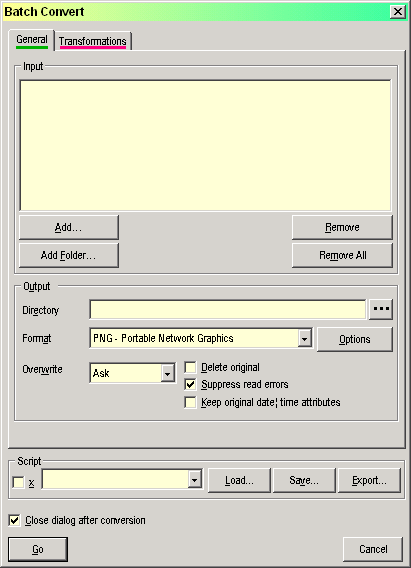
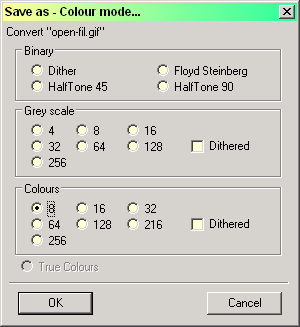
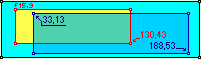
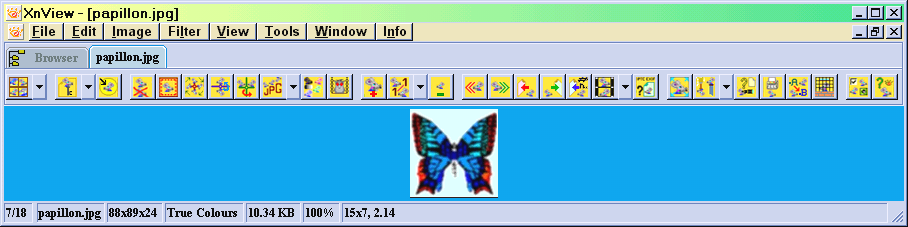
    Below: the same picture, converted into three different formats.

    Original BMP

    Original BMP

    JPG

    JPG

    PNG

    PNG

    GIF

    GIF

    Back to: Topic Menu

    Back to: Synopsis


    • Resize & Canvas Size •


    Back to: Topic Menu

    Back to: Synopsis

    • Slide Show •


    Back to: Topic Menu

    Back to: Synopsis

    • Browser •


    Please, click on the buttons and areas to reach the corresponding topic or paragraph.

    Go to: "And more…" Topic And more… !


    1. Thumb-nails (default), the pictures are displayed as a thumbnail-table. An info-text shows the information about the file.
      A right-click calls a local menu, where special browser commands are set, like the tumbnails size, the frames layout, etc. These commands are available too in the View menu which becomes:


    The sub-menu “Thumbnail Size” is shown beside the menu.
    1. Thumb-nails and labels allows to add some labels for the thumbnails. The labels you want for your thumb nails must be chosen in an Option page previously.
    2. Thumb nails and details : Same as Details List further, but each row begins with a thumb nail on which all overlay markers are displayed (Exif, IPTC, Rating etc.)
      You need thumb nails at least 80 pixels high, or else the last row should be truncated at height.
    3. Icons, the files are shown as an icon of each file-type; files which aren't associated with a programmeme
      have a standard Windows icon like this one :
    4. List, only the files names as (a) column(s).
    5. Details, displays a table which provides a complete information for each picture, including the text-description, Rating etc..

  • The sub-menu Filter by allows to display the files as thumb-nails for some file-types only :

  • The same menu is also reachable from the small tool-bar using the “Filter by” button

  • The sub-menu Sort by…allows to choose the current sorting mode. You can get it too from it's button on the small tool-bar.


  • The frames layout choice is shown at the right side.
  • Since the version 1.80.x, there are two layouts (9-10) showing the thumb-nails as a film-strip.
  • vers-image.pngView the layout # 9…
  • The displayable files types can be chosen now from the OptionsBrowserFile-list

  • Miscellaneous


    Back to: Topic Menu

    Favourite Folders

    Back to: Topic Menu

    • Browser Mode : subsidiary functions •

    1. Choose the destination directory for the multi-page file to create,
    2. Choose a name for this file,
    3. Choose the format…
    4. Press the Add button : you get the appropriate choice-dialogue for the files to embed in the multi-page:
    1. Choose the files in the same way than for Convert
    2. Press the OK button : you come back to the creation-box
    3. Press the Create button
    4. Close the box.
    1. Select at least one picture on the thumb-nail table; to select several pictures, strike the CTRL key and keep it pressed.
      Now, theHTML button button becomes available on the tool-bar.
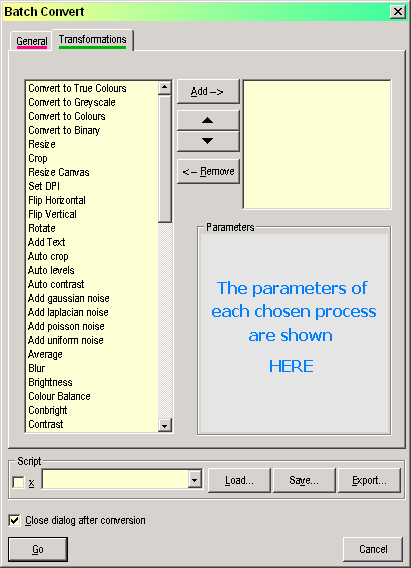
      Use it or the "Tools" menu command to display the thumbnail(s) HTML page creation-box: 
    2. Use the various tick-boxes and writing-fields to configure the page.
    3. Choose the rows and colums numbers following your thumbnails number and size. If all tumbnails can't be placed on the page -with the chosen setting-, XnView builds (a) supplemental page(s).
    4. Click: "Create".
    5. Close the box.
    6. Using: Open the HTML file from a Web or offline browser.
    7. Clicking on each thumbnail, you get each corresponding picture as its original size!

  • Choose carefully the “Width” and “Height”…
  • Avoid to exceed your screen definition, or else you'll get unpleasant scrolling-bars!
  • Try to planne the page as so small as possible, following your thumbnails size and number.
  • Choose other options…
  • When ended, click: "Create",
  • Close the box.
  • Notices:
  • If you wish to save as BMP anyway : The default BMP quality - 256-colour 16millions-colour - is set with regard to the current PC display-mode.
  • If the colour-number is too high, you can resave the file into a lower quality with MS-Paint® or similar.
  • To decrease the file size keeping a high quality, save directly as JPG or as PNG format.
  • The two previous functions are NOT usable outside the Browser. This independant use is planned for a future version…

  • Back to: Topic Menu

    Back to: Synopsis


     Batch transform 


     Some examples for the picture processing 

    Original Picture

    “Image” Menu  “Adjust” “Adjust Gamma”

    Colours Balance

    Swap: RGB  RBG


    Please, click here to see the “Effect” Menu example.

    Back to: Topic Menu
    Back to: Synopsis


    Go to: XnView update


    Back to: Synopsis


    • The programme-Author •


    First name: Pierre-Emmanuel
    Second name: Gougelet
    Born: August 9th 1967.
  • Competences…
  • Hardware: compatible PC, Silicon Graphics.
  • Computer Languages:
    Assembleur 68000 & 8088, Pascal, Fortran, Cobol, Prolog, SQL, C, C++
  • Systems: MS-DOS, Windows NT, Linux, FREE-BSD, Irix…
  • Graphic interfaces: X11, Motif, Win32
  • Other: Shell script, Perl, HTML, Javascript, OpenGL…
  • Back to: Synopsis


    • XnView update •


    Back to: "Install"

     And more… 

     Displays the picture as
    quite full-screen.
    To come back to the normal window,
    press the Esc key on the keyboard.
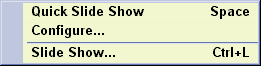
    You can get "Full Screen" pressing
    the mouse-wheel or
    the middle-button too:
    "Full Screen"Normal window.
     The full-screen button.
    Main-windowMain-window

     Refreshes the thumbnails display if
    the viewed directory is updated…
    Browser window

     Launches the printer for the selected
    thumbnail file…
    Browser window

     Allows you to make screen-shots…
    Browser window
    SetUp dialogue

     Launches the scanner…
    Browser window

     About… 

    Calls the inescapable famous box
    "ABOUT…" below 


    Browser window

    Main-window